

Understanding Image/media optimization with cloudinary


Image Optimization over time have been neglected by most web developers, can we say it’s because of negligence or not being aware of how to do it well?!
Before, we dive down on what Image Optimization is and how it can be implemented in various programming languages and also for WordPress users. I always talk about WordPress in most of my articles because my journey of Web Development began with it, okay, enough of WordPress talk.
Image Optimization
I simply place my definition as the act of reducing image size without having to affect the image quality which will enable the image load much faster on web pages.
More Explicit Definition
Image Optimization: Optimizing web images is a process of delivering high-quality images in the right format, dimension, size, and resolution while keeping the smallest possible size. It can be done in different ways, be it by resizing the images, caching, or by compressing the size.
Having known the fundamental and most important definition of Image Optimization, so let’s talk about how we can make this possible with one technology I very love using across all platform I build, which is the Cloudinary.
Cloudinary is a media management technology which helps you manipulate, optimize, normalize and also allow you to store images in the Cloud. My experience with this technology has been an amazing one so I tend to preach about it.
As a developer, you have to know how to help your users in managing the internet data by optimizing your media (pictures / videos) across your platform.
So, I will just outline the basic step on getting Cloudinary in your Angular, React and WordPress applications.
Before this, make sure you have registered with Cloudinary, the registration is absolutely free.
Angular: First Install
To install the Cloudinary SDK for your Angular version, run this NPM command:
npm install cloudinary-core @cloudinary/angular-5.x --save
React: First Install
To install the Cloudinary SDK for your React, run this NPM command:
npm install cloudinary-react
Then inside your program, you have to import:
import React from 'react'
import { CloudinaryContext, Transformation, Video } from 'cloudinary-react'
and then:
axios.get('https://res.cloudinary.com/CLOUDNAME/image/list/xmas.json').then(res => {
    console.log(res.data.resources);
    this.setState({gallery: res.data.resources});
});
Your code should be similar to like that above, then you can write the rest of your program. The Cloudinary documentation is quite a well-detailed one which will help you get much understanding on this.
WordPress: First Install
Install the WordPress plugin through here , the documentation will help with much quick guide on how to install it as a plugin and use it, you are good to go👍🏽. After installing the Cloudinary wordpress plugin, you have to upload the medias you want to work with to the Cloudinary and through which you can optimize and manipulate your media from there.
One of the beautiful things about image optimization with the Cloudinary tool is the ability to retain the image, video or any media quality.
OPTIMIZING IMAGE QUALITY USING f_auto
https://res.cloudinary.com/demo/image/upload/w_300,f_auto/pond_reflect.jpg
Initial Image size: 20kb

Image Rendered from cloudinary size: 9kb
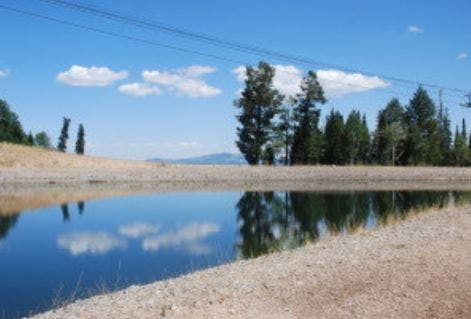 The beautiful thing is that the quality still remains exactly the same, YES!!
I hope this article helps you to understand Image Optimization, how to get the basics using Cloudinary technology tool.